


I recently shared my kitchen before and after in another post, but since then had made the decision to DIY my beadboard kitchen backsplash! I have wanted beadboard backsplash for sooooo long but never pulled the trigger on it! I was too intimated and we previously lived in a rental and couldn’t do anything permanent. Finally, I went for it and am so glad that I did because…let me tell you, this beadboard kitchen backsplash LOOKS SO FREAKING GOOD!

The previous backsplash was a grey grout peel & stick subway tile from Amazon. I put it up on 2020 and still use it in other parts of the house to this day. The only reason that I changed it was because I actually saw how affordable beadboard was at Home Depot. The 8ft x 4ft sheets were only $25 and with the amount of area I was planning to cover, I only needed two. That also counted for covering the soffit above the cabinets as well because I wasn’t satisfied with the unfinished look it had previously.

The Process
Remove Old Backsplash
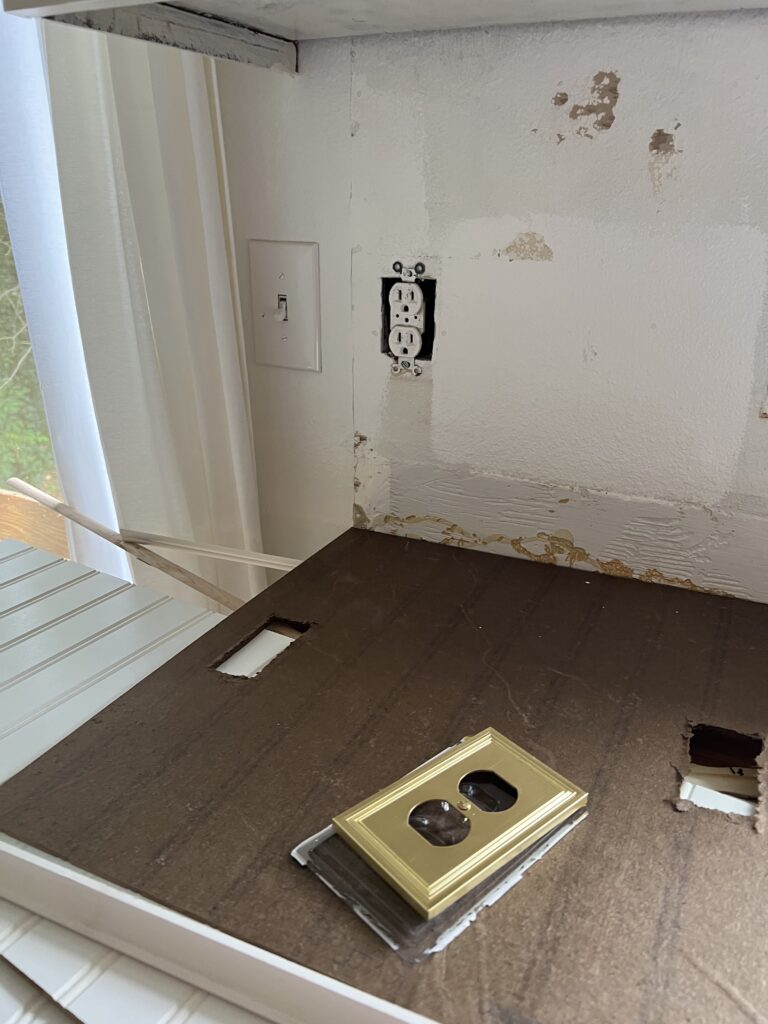
The process was pretty simple, honestly. Way less intimidating than you may think – much less intimidating that I expected and built up in my head! Step one was to remove the peel and stick that I put up when we moved in. I literally just had to peel it away from the wall. You’ll notice a little damage on the wall due to the areas that I added construction glue. 100% not a necessary step for peel and stick but, at the time, I didn’t expect to want to change backsplash so soon and wanted it to be pretty permanent. The discoloration on the wall is from where the original 70’s backsplash was that I removed. It was the kind that matched the original counter tops and only went up about 5 inches around the sick, side walls, and to the bottom of the original microwave. I’m telling you, IT HAD TO GO.

Measure & Cut
The second step was to measure each section of the wall, decide where I wanted seams, cut to length and height and lastly, measure and cut rectangle holes for the outlets.
Attach Beadboard
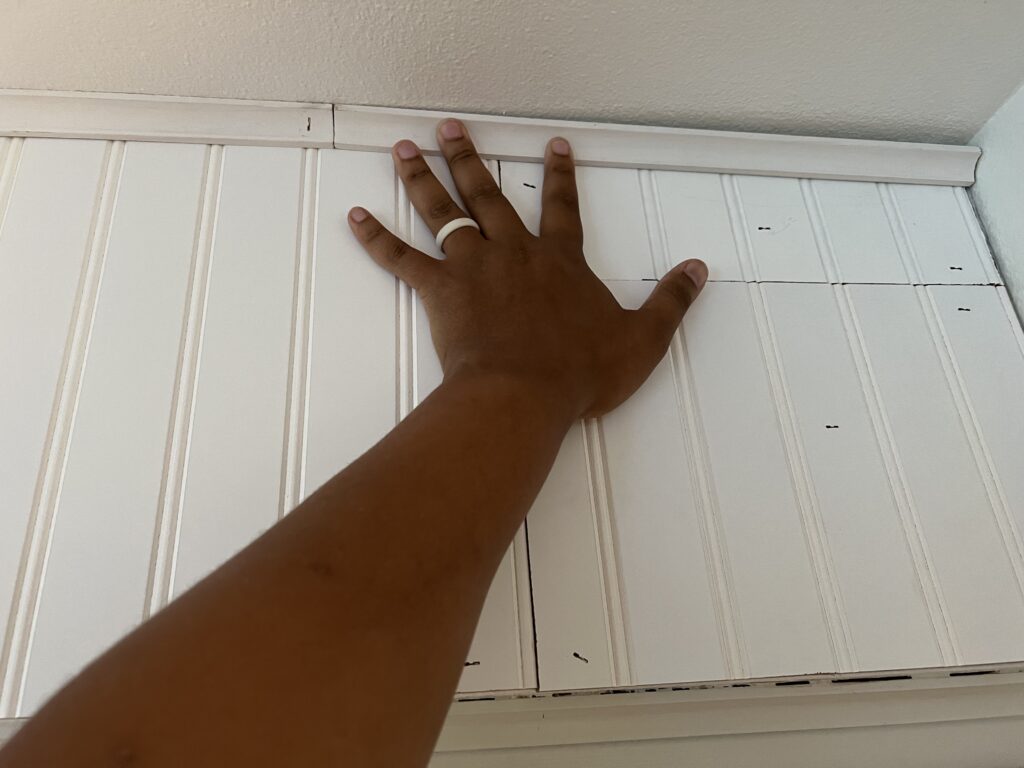
This would be the time to switch off any breakers that go to your kitchen outlets and remove the outlets before attaching the beadboard to the wall. Using construction adhesive on the unfinished side of the beadboard and a nail-gun and air compressor, attach the beadboard to the wall. You could get away with just using nails, but I wanted these suckers real tight against the wall and construction adhesive helps with that! While you’ve got the nail-gun out, this would be the time to add trim if you decide to use it! I went with PVC 3/4 Inside Corner Molding at the ceiling and 3/4 PVC Quarter Round Moulding where the backsplash meets up with the countertop.

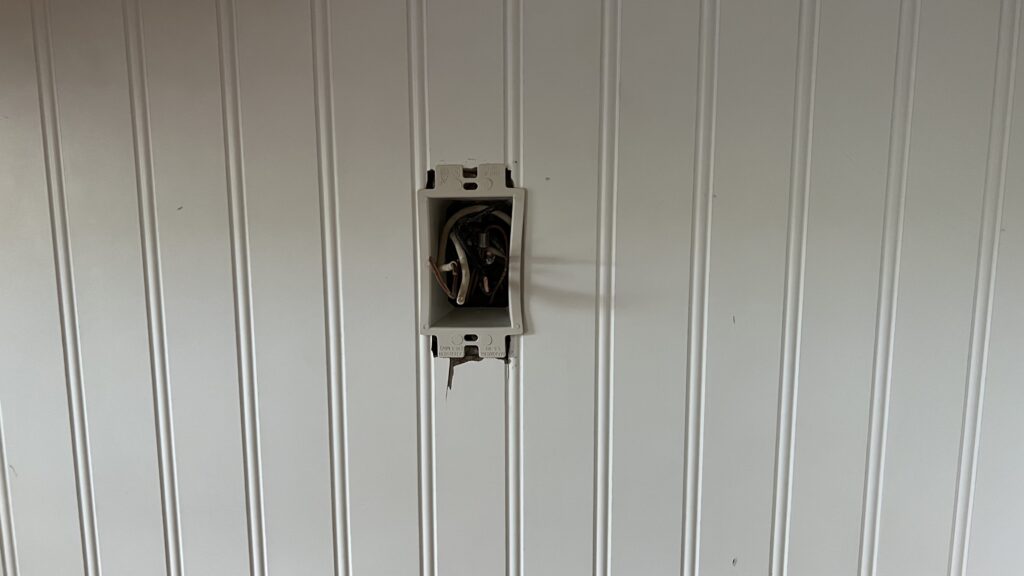
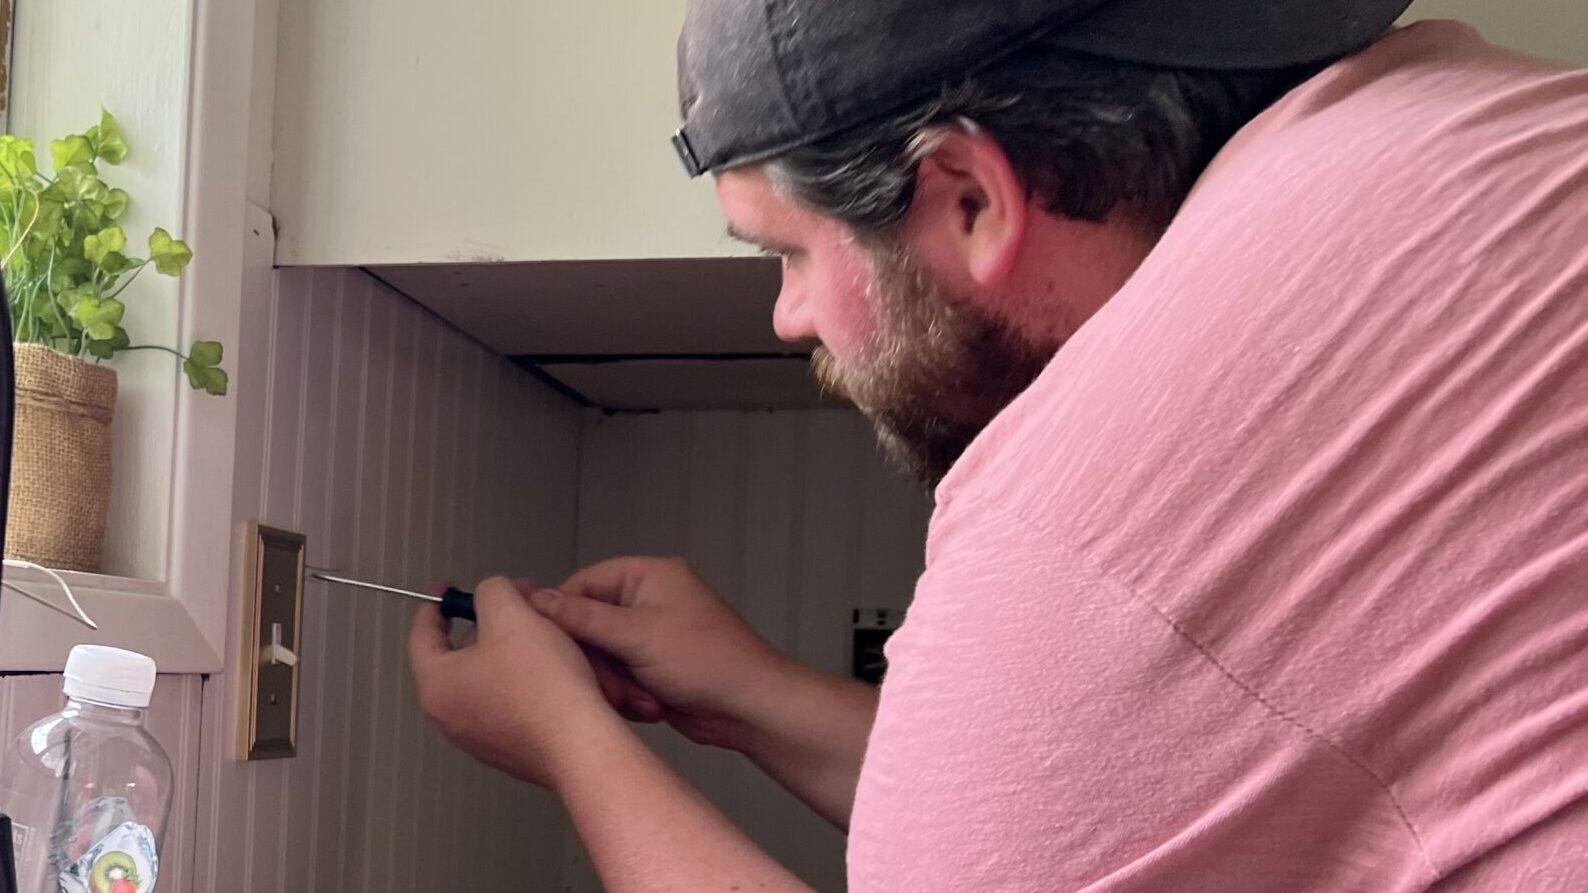
Add Outlet Extenders & Reconnect Outlets
While your kitchen outlets breakers are off, add the outlet extenders and reconnect any outlets. If your outlets were outdated, this would be a great time to update them! This is the part where I called in my husband for help. I can do all things except mess around with electrical stuff! He hopped up on the counter and reconnected all of the outlets for me while I moved on the the next step.

Fill Nail Holes & Seams
I think that this was the part that took the longest and went by the slowest. Using lightweight spackling, fill all nail holes and anywhere that the beadboard met together with another piece. This part is the most important for having a seamless looking backsplash. You don’t want to be able to tell that you used multiple pieces. At the end, it should look like one continuous piece.

Sand & Paint
Unfortunately I didn’t take any pictures of this step but it’s very straightforward. Lightly sand with a fine sanding block anywhere that you used spackling. The idea is to eliminate any bumpy or raised spots. Dust any remaining dust off of the backsplash and paint! The color I used is White Duck from Sherwin Williams. Wait for the paint to dry before moving to the next step!
Replace Outlet Covers
The final step is to add your outlet covers! I chose to go with golden champagne covers to match with the cabinet hardware.
WE DID IT!
After a little workspace clean up, we’re done! It turned out more beautiful than I could have hoped and I DIY-ED that ish! After this project, I gained the confidence to take on projects that seem challenging and want to continue learning and pushing myself to do bigger and better projects around the house! I really hope that you’re able to tackle one of the projects you’ve been eyeing and planning around the house. Honestly, the hardest part is believing in yourself and I believe that you can do anything that you put your mind to! Have fun and do the damn thing!

Be sure to check out some of my other posts!

View comments
+ Leave a comment